
Engraver bowl vice
Engraver bowl vice
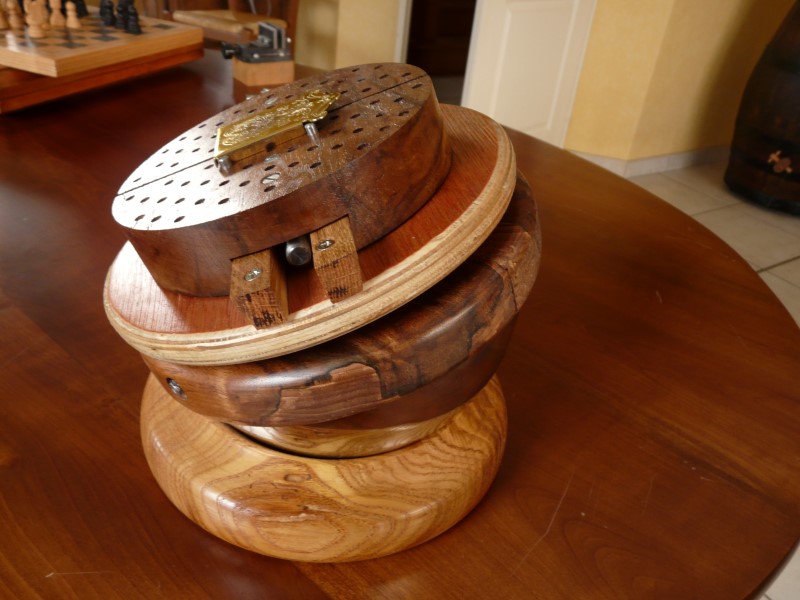
Table of contents :
Engraver’s bowl vise

Here is a tool that can appear to look somewhat strange, it is a vise which aims at fixing the work-piece a metal engraver is working on.
I’ve been inspired for this tool by Jean Santos, French author of the site Gravures et Couteaux . He explains that, back to the 18th century, this tool was made with a cannonball, cut in two pieces. The hemispherical shape actually serves to tilt the vise under whatever necessary angle, in order for the craftsman to work as comfortable as possible.
The engraving work can be done using two main techniques :
-
Either with the engraver hand chisel :

In this case, the chisel is hold in the palm of one hand, while the other hand makes the work-piece turn, this allows to engrave the most tight curves, like for lettering for instance.
For that reason, the top plate of the bowl vise is mounted using a couple of ball bearings, and can freely rotate. -
Either with the burin and the hammer.

In this case, the top plate must not turn.
The bowl features a brake that allows to lock the rotation of the plate.
As well, in order to keep it as stable and steady as possible, it is important for the bowl to be quite heavy, and have a good inertia.
See this article for an overview of the engraving tools.
Here are the steps of the making of this vise :
The bowl:

1- My choice, for making the “cannonball”, went to a cooking utensil which is a stainless steel pastry bowl. The shape is approximately hemispherical. The diameter is 20cm.
|

2- The bowl is filled with all sorts of steel scraps, chopped into pieces. In the center, a vertical shaft, on which are mounted the two ball bearings.
|

3- I settle down outdoor for melting the lead that will be used to thicken the steel scraps, and provide a heavy basement.
—|—|—

4- The gas stove visible on the precedent picture is well insufficient to melt 1kg of lead. So I use the heavy artillery.
|

5- Each lead piece weights 1 kg. These are diving belt weights.
|

6- The lead thickens the steel pieces together (funny cooking).

7- But the lead gets solid too rapidly, so I heat it in order to sink at the bottom of the bowl.
|

8- Here is my torch, it is an
“onlygaz” which works with
domestic gas and hot air. This is a unique patent from a French maker, the
flame can reach 2300°C without any oxygen nor acetylene. Very efficient.
(Thank you my friend Koun !)
|

9- As the lead did not fill the bowl flush, I finished the filling with
plaster.
Eventually, the bowl is quite heavy ~13 kg ?
The base:

1- I will turn the base out of a piece of firewood. I need a template to reproduce the shape in negative.
|

2- Then I make a positive template.
|

3- And here is the base, wood turned out of oak. Finish is linseed oil.
—|—|—
The plate and the jaws:

1- A base plate is turned and is inserted tight on the two ball bearings.
|

2- A plywood plate is glued on top of the base.
|

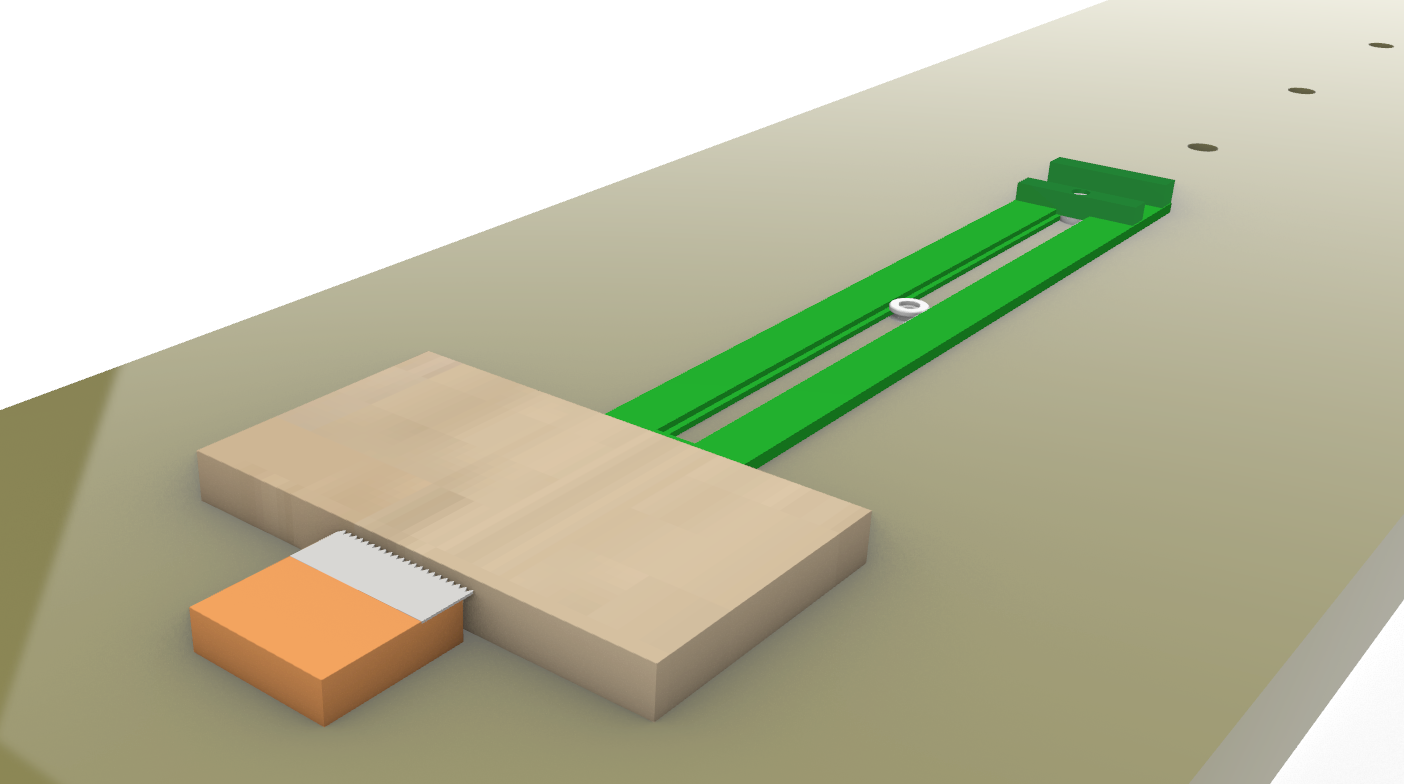
3- Here I’m making a walnut wood disk that will be the jaws. It is rough cut on the bandsaw and shaped round on the disk sander. The dove tail shape slide was cut previously on the router table, while the piece was still square.
—|—|—

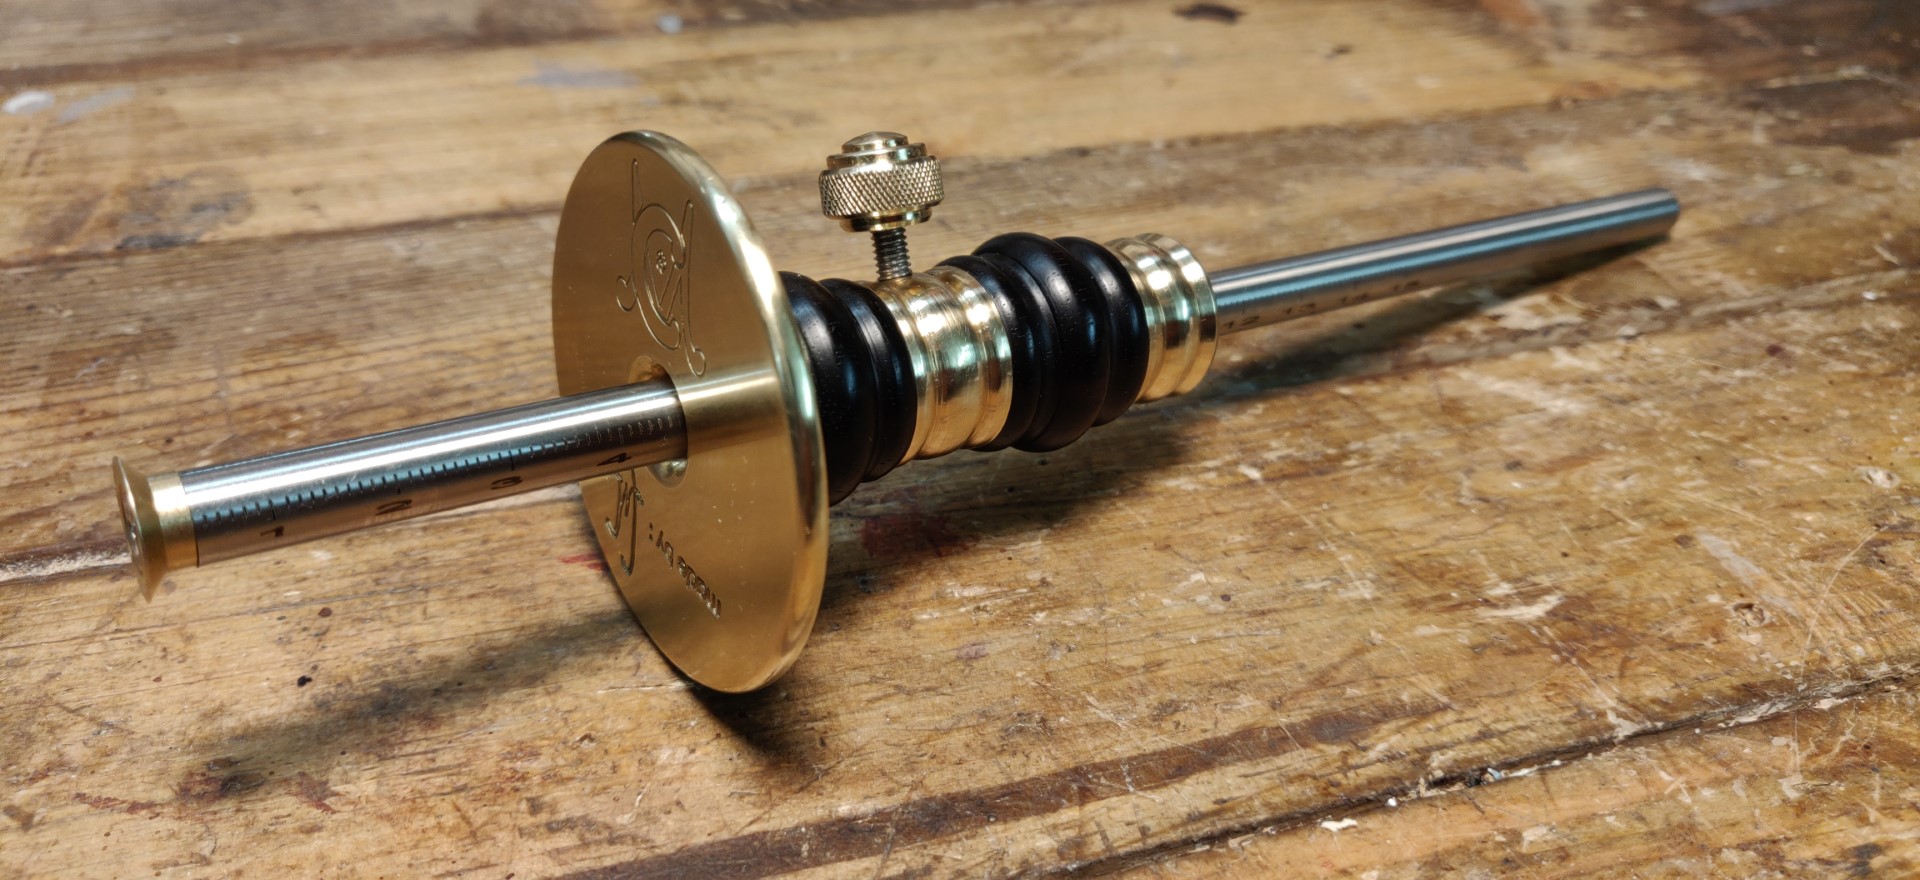
4- I want both jaws to open and close symmetrically from the center of the plate. For that, I need a screw with both right and left threads. I could have turned on my lathe the left thread screw, but I have no mean to make a left thread nut accordingly. After quite a lot of research, I finally found the solution of using a cable strainer. Here is how I cut it apart.
|

5- And here are the parts that will serve.
A square head is also milled at the end of the screw.
|

6- The two parts of the screw will be joined to a central shaft, using brazed spigot joints.

7- The central shaft has a shoulder that will be captured in a square tubing cage split in two parts.
|

8- The shape, closed. The rotation is free while translation is locked.
|

9- The central screw in place, between the dove tail slides rails.

10- One of the jaws is installed. You can see on the right how it is fitted on its nut with two screws.
|

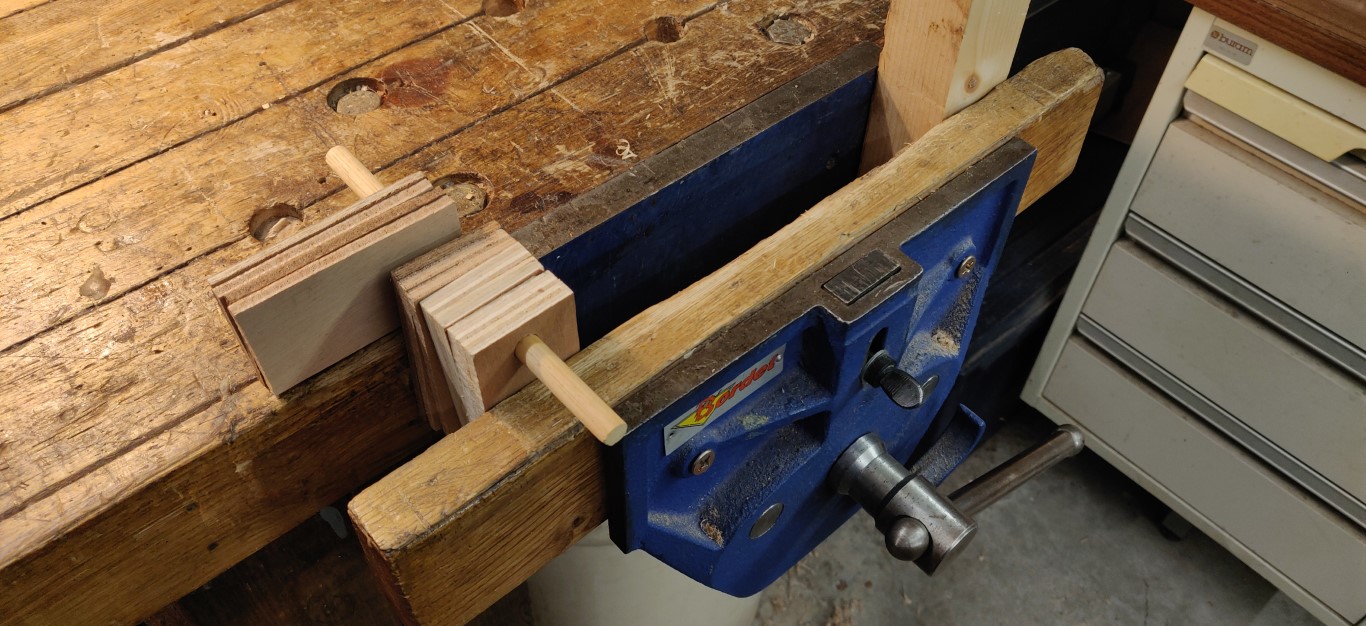
11- The jaws are drilled with plenty of holes to receive the little pins that will be used to hold any shape of workpiece. There are also 4 T nuts that will allow the workpiece to be clamped with screws.
|
The workpiece grip

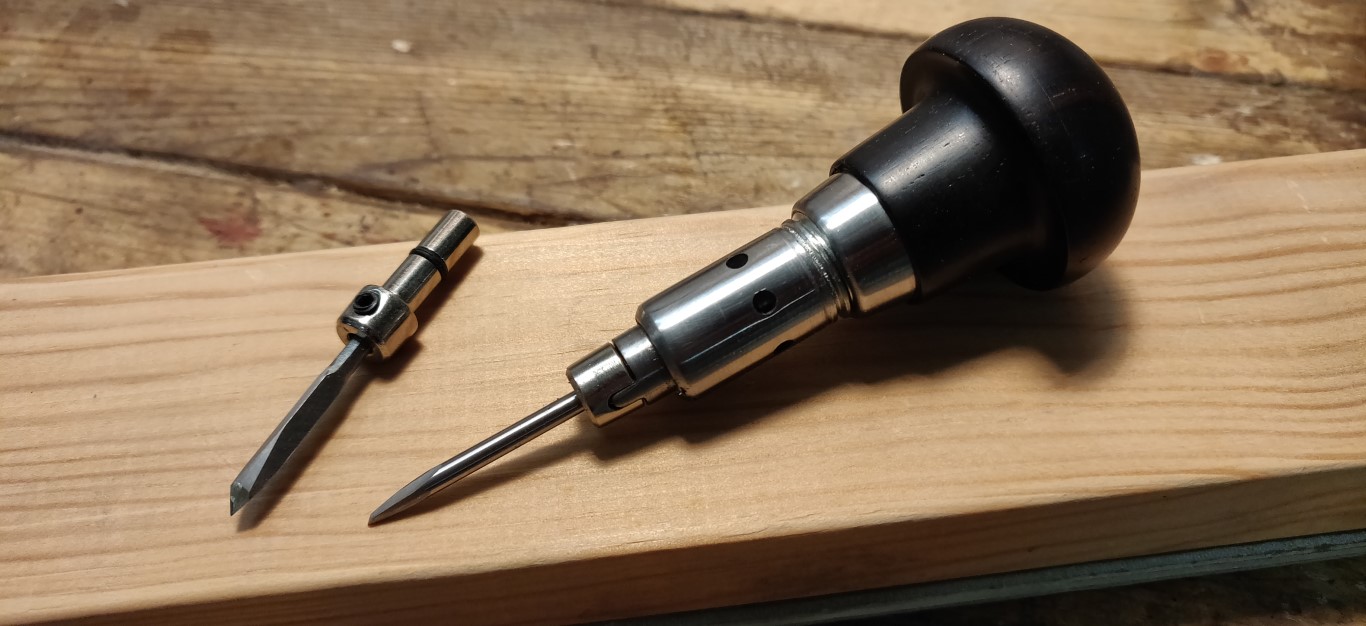
1- Here is an example of piece to be engraved. It is locked with little pins made of steel.
|

2- Opening of the jaws, thanks to a T shape wrench made for that purpose. It’s actually an 8mm socket, reverted to use the 6.35mm square end.
|

3-The issue with that kind of pin is that they always tend to sink in their
hole, making it difficult to take them off. I milled a little flat section
which has actually two purposes :
- better adaptation to the flat sides of the workpiece.
- thanks to the little hole on the flat surface, it is possible to grab and
pull them out of their hole.
—|—|—

4- A little key has been made for that purpose out of piano wire.
|

5- Other possibility for fixing the piece : using 4 screws that will allow the use of small clamps to hold down the piece.
|
The brake

1- A disk of walnut is put on the lathe, the two outer rings will be used..
|

1- The rings are cut in two pieces to be able to insert them under the top plate. Two springs keep the pads apart, and two pressure screws on the sides allow to tighten the brake and lock the top plate rotation.
—|—


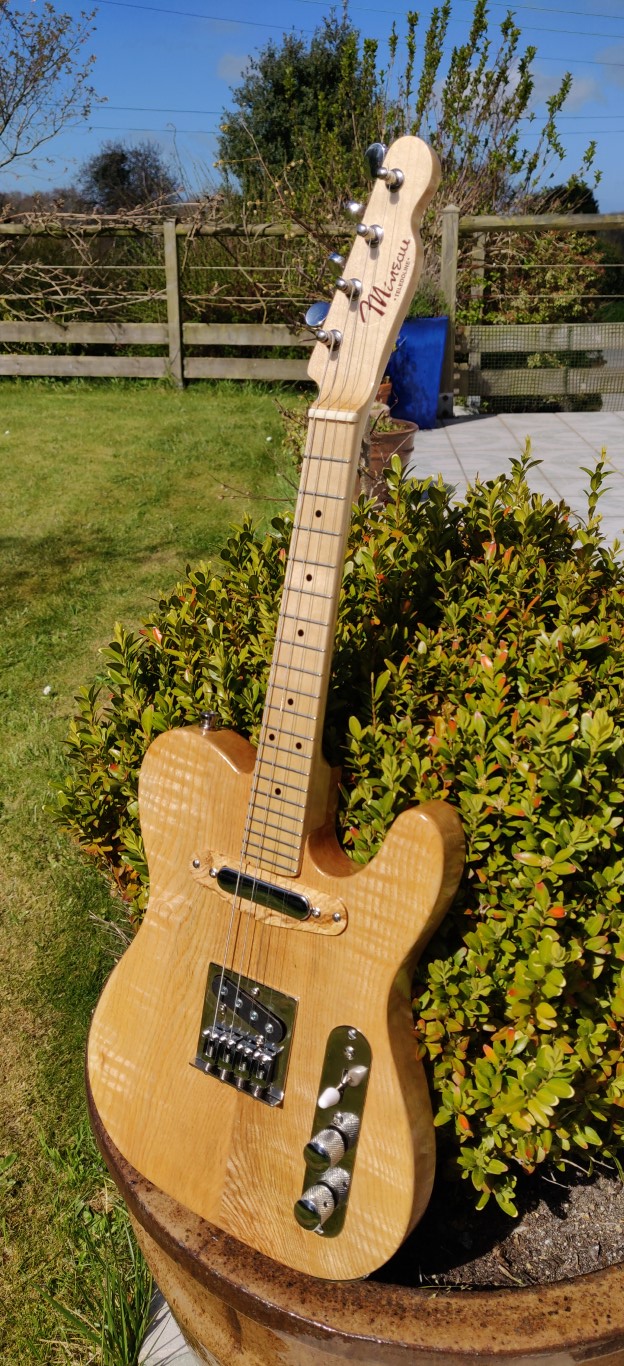
And to finish with, here is a video showing the use of this engraver bowl vise. In this video, I am only showing the gesture of the engraver, illustrating the design of the tool. The mounted piece is actually a tailpiece cover for a mandolin, and it is an industrially made one. It is typically the kind of piece that I wish I could do by myself … one day …
Feel free to leave me comments, either here below, or also on Facebook, or on HomemadeTools.
Christophe

Older readers comments
Hello from frannyz
Hello from OV