
Disk Sander
Disk Sander
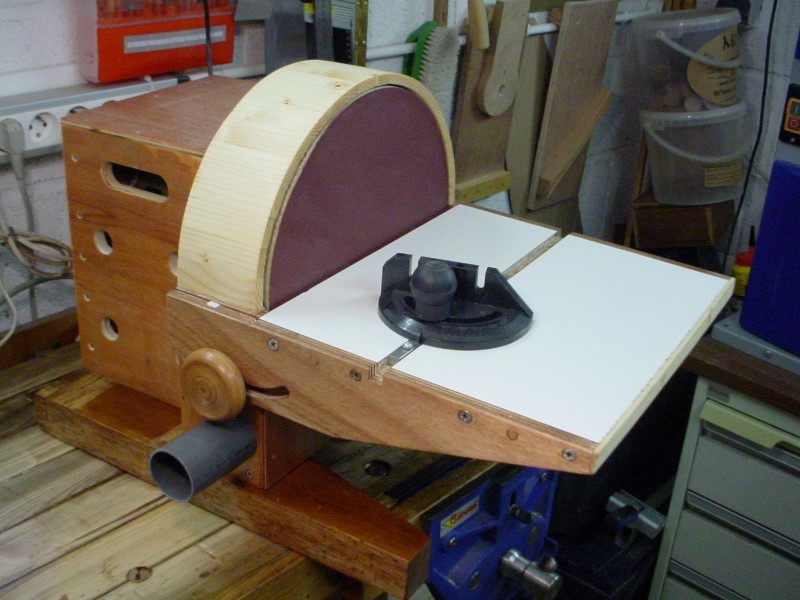
Table of contents :
Disk Sander

I have built this disk sander on the model of the one achieved by John Heisz, the author of the site “I build it.ca”. You can see John’s sander on his site or on the tooling encyclopedia homemadetools.net.
The basis of this machine is a washing machine motor, salvaged from an old model, those that still had easily re-usable motors (the kind with only two speeds, washing and spinning).
I have, about that topic, written a document, which can be downloaded here, that explains how to distinguish between the two kinds of motors, and how to wire them.
Apart from the motor fixture, the sander I have built is very similar as J.Heisz’s one. The sanding disk has a diameter of 305 mm (12").
Here are the steps of the build :

1-The washing machine motor.
|

2- I couldn’t manage to remove the pulley from the shaft. This plate is tightly fit over the pulley, and will receive the sanding plate.
|

3- The sanding plate is made of 19mm melamine.
—|—|—

4- I imagined this system of half sleeves for gripping the shaft and fix the walnut plate.
|

5- The sleeve halves are tightened thanks to screws. It is trued up with a bedane chisel, with the motor spinning.
|

6-The intermediate plate, made of walnut, it screwed.

7- The basement of the machine. Salvaged solid heavy wood, for a good stability.
|

8- Front face.
|

9- Back. The motor is attached with 4 bolts.

10 - Motor box, with lots of vents. The upper ones also serve as handles.
|

11- First run of the sanding disk. The wobble is reduced using little plastic sheet shims, placed under one of the screws.
|

12- Box, for dust extraction.

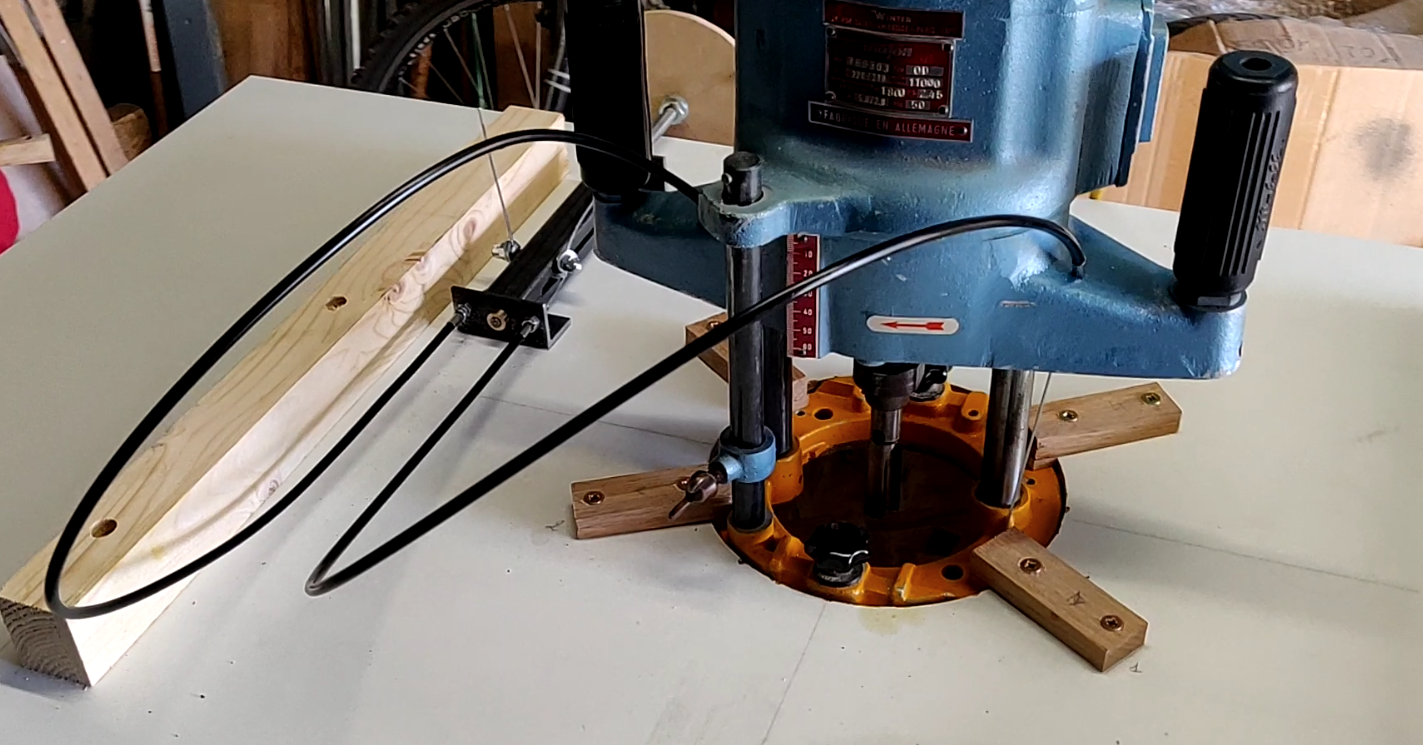
13- The side pieces of the table. Preparing the circular pivot. This inspired system was borrowed from John Heisz, it allows to have the rotating axis very close to the surface of the sanding disk.
|

14 -female parts of the pivot. Using the router table.
|

15- Male part, out of nylon. Will reduce friction. Roughing out with the bandsaw.

16- Fixing it on a purposely made mandrel on the lathe.
|

17- Cutting with the bedane chisel.
|

18- Cutting on the lathe allows for a precise fit of the male part in the female part.

19- The nylon circle is cut in two pieces, I keep a little more than a quarter of a circle. The screws and holes are the same as the ones used for fixing on the mandrel on the lathe.
|

20- Making the knobs that will tighten the table in place.
My personal technique : Two wooden disks are turned out of a same piece and
then parted in two pieces. A bolt screw, with a pin through its head is inlaid
into one of the disks.Both parts are then re-glued with epoxy. The knobs are
then put back on the lathe and turned to their final shape.
|

21- The dust extraction port. 50 mm diameter.

22- The table installed in place. It has a groove to accept a miter gauge, it is the one from my little bandsaw.
|

23- The upper hood is a segmented assembly, made of 20 pieces cut at a 4.5° angle.
|
24 - The finished machine. After sanding and a double coat of tung oil with siccative.

25- The table can tilt up and down, without changing its rotating axis, which keeps very close to the surface of the disk. The knobs, made with sturdy bolt screws, allow for a good tightening of the table.
|

26- I wired the two speeds of the motor, using an inverter switch. Franckly speaking, the “spinning” speed is way too fast and will probably not be of any use. The switch is a circuit breaker that limits 10A.
|

27- The finished hood.

28- Detail of a knob holding the table in place.
| |
Feel free to leave a comment, here or on Facebook, or also on HomemadeTools.
Christophe

Older readers comments
Hello from Marcelo
Hello from Specsaver70