
Radius sanding block
Radius sanding block
Making a radius sanding block
The radius sanding block is an essential tool when you want to make an arched fingerboard on a string instrument.
Here is how I proceed to make one, whatever the radius is :
|

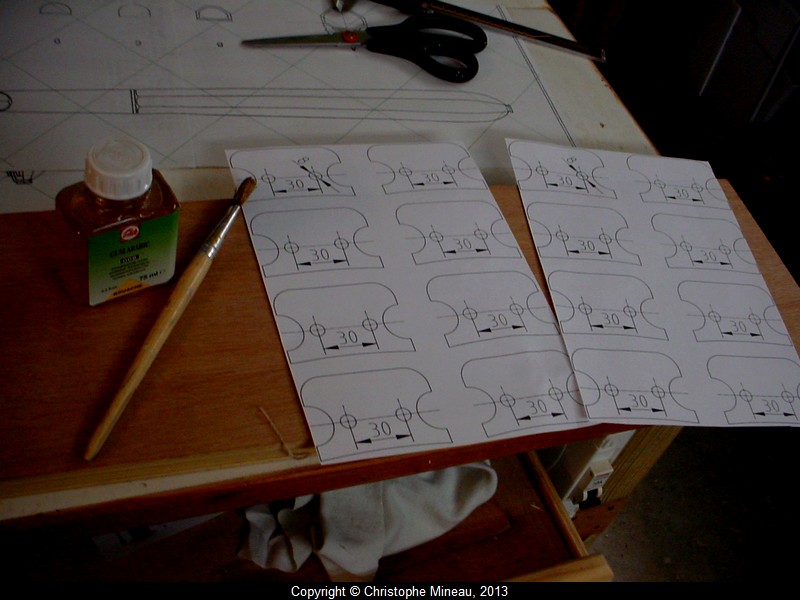
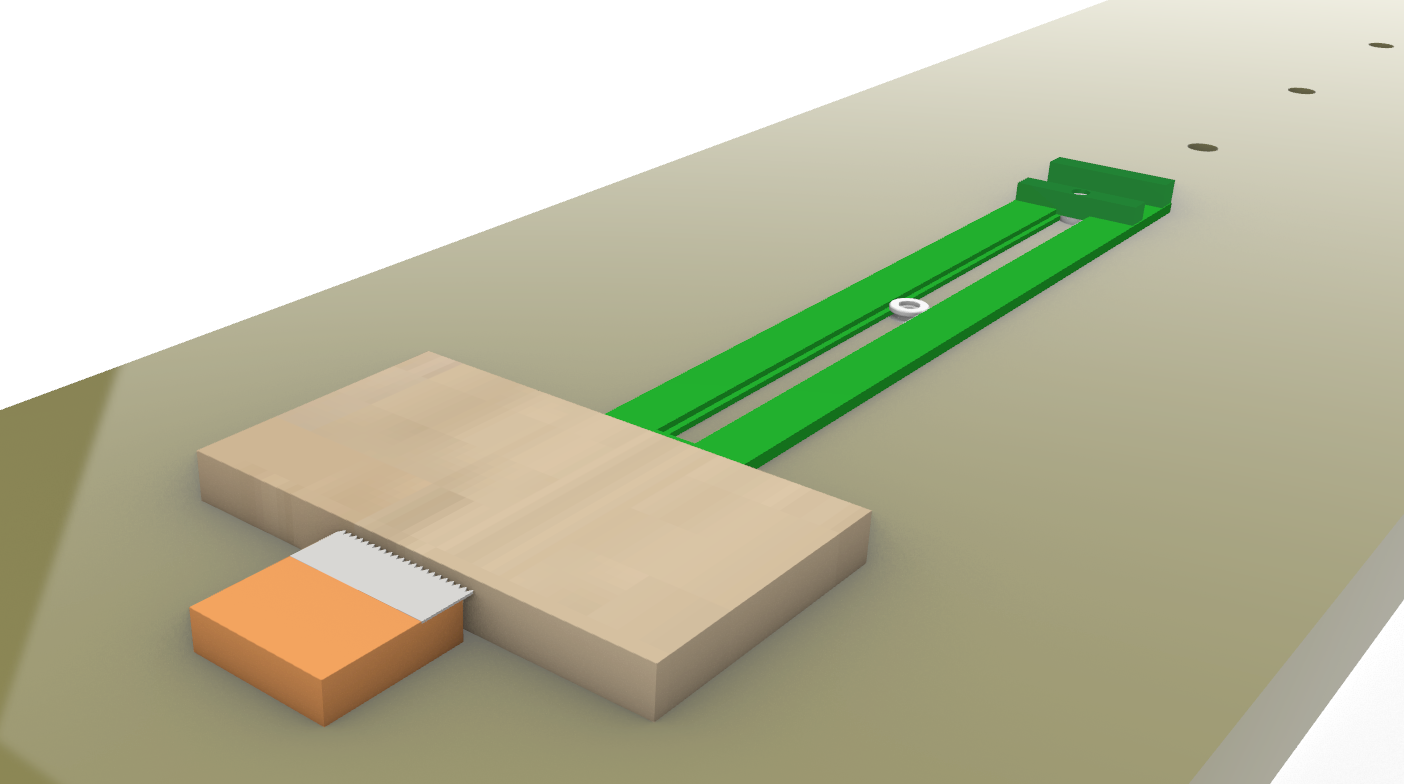
The operation starts with the drawing of a section plan using a CAD software. I personnaly use QCAD. The file for that 12" block can be dowloaded here.
I use arabic gum to stick my paper tamplates on some 15mm plywood.
|

Rough cut of each of the 16 pieces, on the band saw..
|

I first drill the left side hole of each piece. Then I use this little fixture in order to be sure that the second hole is precisely drilled always the same distance away from the first, on each piece. This is important to align later the stack of pieces in a straight way.
|

The principle of indexing on the fixture, a little 8mm diameter aluminium
post, fixed on the plate, which is fixed on the drill press table. The drill
bit is set upon the second hole.
|

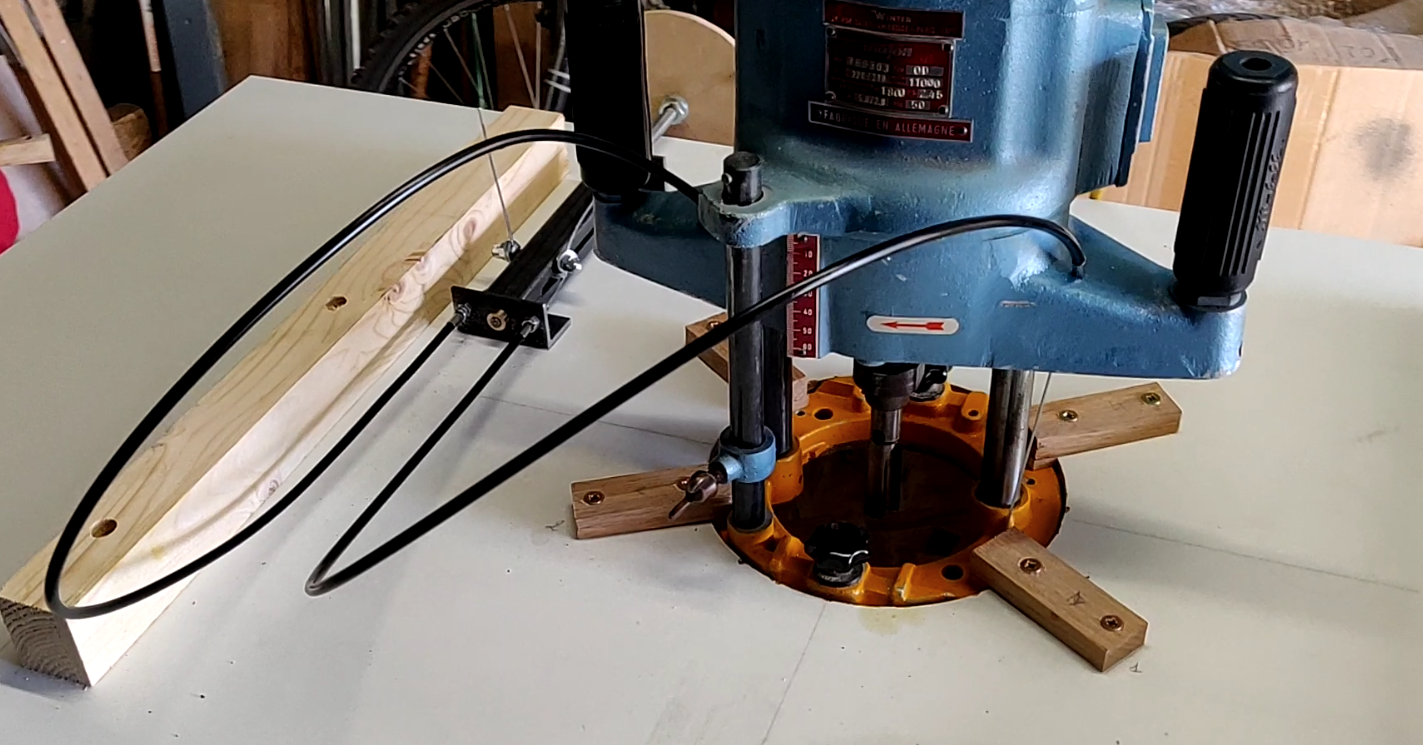
The first piece is given a couple of aluminium posts and will then serve a s a
template for all other 15 pieces. I use a copying rooter bit to replicate the
pieces.
| 
In action, just for the picture.
|

Actually, with protections.
|

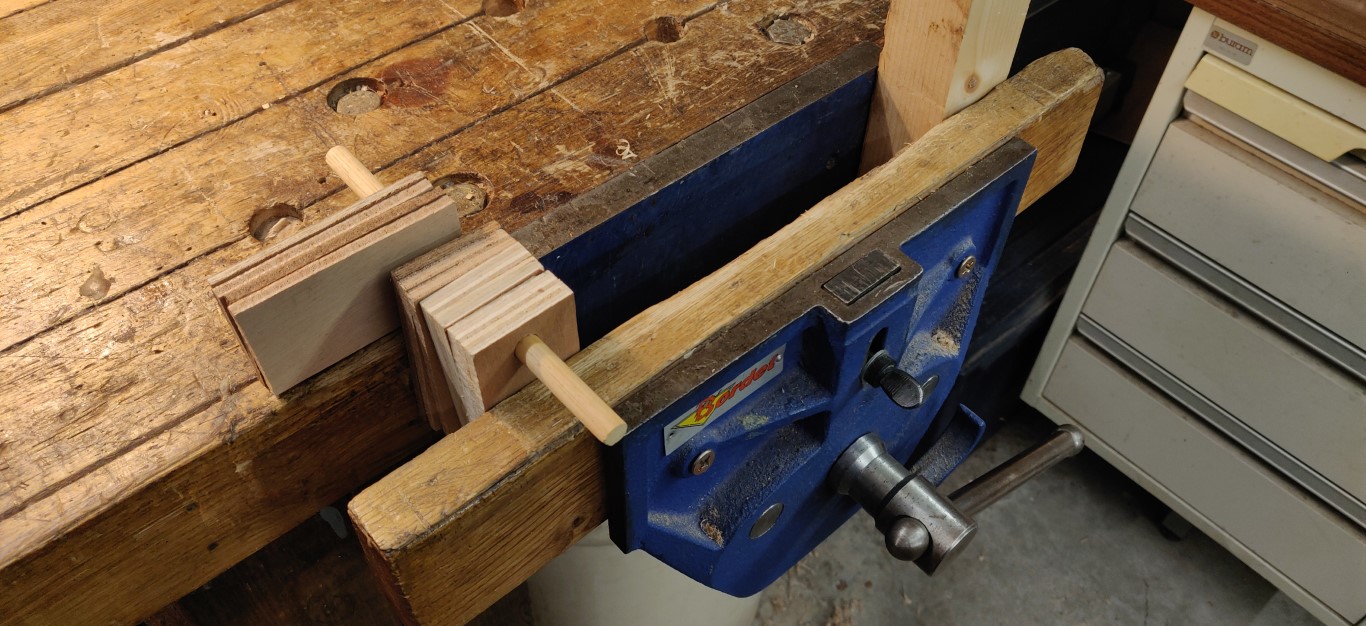
16 pieces finished and aligned.
|

After removing the paper template, I stack all the glued pieces on to a couple
of aluminium poles, 8 mm diameter. I often prefer aluminium than steel,
because the diameters are always more precise and it is also stiffer than
steel.
|

Check the alignement.
|

Clamping flat on a the table of my band saw.
|

Once dry, I sand the little bumps with a foam block (actually a mouse foam
pad). The sole is straight and the curve is nice. Ready to use !
|

The top / handle. Can be enhanced with a laquer finish.

Older readers comments
Hello from pallud
Hello from bigodet